Install CMake 3.17. Add CMake to system PATH. See Installing CMake, its documentation, and running CMake for Windows to build a project. Out-of-source build is chosen for the following projects.
*** Outline ***
- CMake 3.17 CMakeLists.txt for deviceQuery.cpp
- deviceQuery.cpp project with Eclipse CDT4 - MinGW Makefiles generator
- deviceQuery.cpp project with
Visual Studio 14 2015 generator
- CMake 3.17 CMakeLists.txt for svdCompexDevice1.dll
- svdComplexDevice1.dll project with Eclipse CDT4 - MinGW Makefiles generator
- svdComplexDevice1.dll project with
Visual Studio 14 2015 generator
- CMake 3.17 CMakeLists.txt for bandwidthTest.cu
- bandwidthTest.cu project with
Visual Studio 14 2015 generator
- CMake 3.17 CMakeLists.txt for Mandelbrot project
- Mandelbrot project with
Visual Studio 14 2015 generator
- Various references
- CUDA references
CMake 3.17 CMakeLists.txt for deviceQuery.cpp
- Generate deviceQuery folder on Windows 10 desktop.
Add src folder and empty CMakeLists.txt file in deviceQuery folder.
- Copy and paste the file C:\ProgramData\NVIDIA Corporation\CUDA Samples\v8.0\1_Utilities\deviceQuery\deviceQuery.cpp into deviceQuery.cpp file of src folder, which contains one file.
- Paste the following CMake 3.17 file into CMakeLists.txt
# CMakeLists.txt to build deviceQuery.cpp
cmake_minimum_required(VERSION 3.17)
message(STATUS "CMake version: ${CMAKE_VERSION}")

project(deviceQuery VERSION 1.0
        DESCRIPTION "My first C++ program"
        LANGUAGES CXX)

find_package(CUDAToolkit)

# For compilation ...
# Specify binary name & source file to build it from
add_executable(
    ${PROJECT_NAME}
    src/deviceQuery.cpp
)

# Specify target & include directories
target_include_directories(
    ${PROJECT_NAME}
    PRIVATE
    "C:/ProgramData/NVIDIA Corporation/CUDA Samples/v8.0/common/inc"
)

# For linking ...
# Specify target & libraries to link it with
target_link_libraries(
    ${PROJECT_NAME}
    PRIVATE
    CUDA::cudart
)
deviceQuery.cpp project with Eclipse CDT4 - MinGW Makefiles generator
- Generate build-deviceQuery-Eclipse folder on Windows 10 desktop.
- Launch CMake 3.17 GUI.
- Click File menu then select Delete Cache.
Input the path of deviceQuery folder in Where is the source code.
Input the path of build-deviceQuery-Eclipse folder in Where is build binaries.Click Configure button.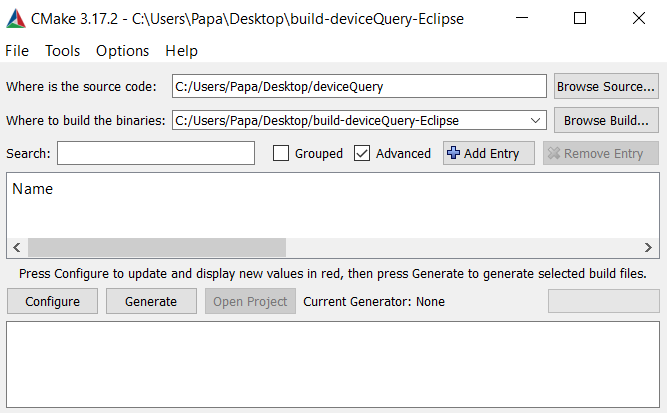
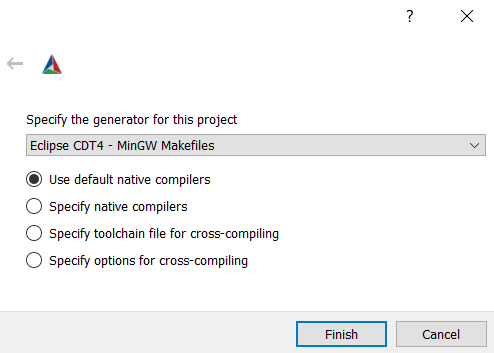
- Select Eclipse CDT4 - MinGW Makefiles for Specify the generator for the project.
Click Finish button.
- Click Configure button.

- Click Generate button.
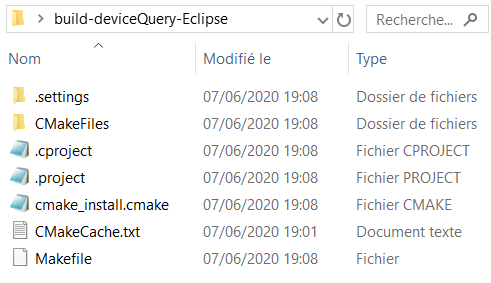
- Fives files and two folders are generated in build-deviceQuery-Eclipse folder.
- Launch Eclipse CDT.
- Click File menu then select Import...
Select panel appears.
Select Existing Projects into Workspace.Click Next > button.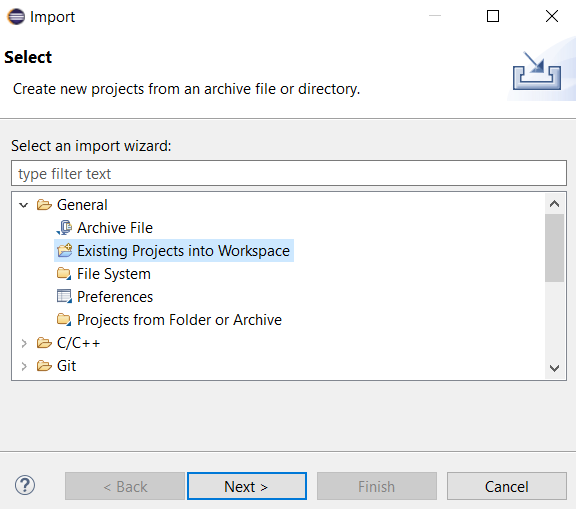
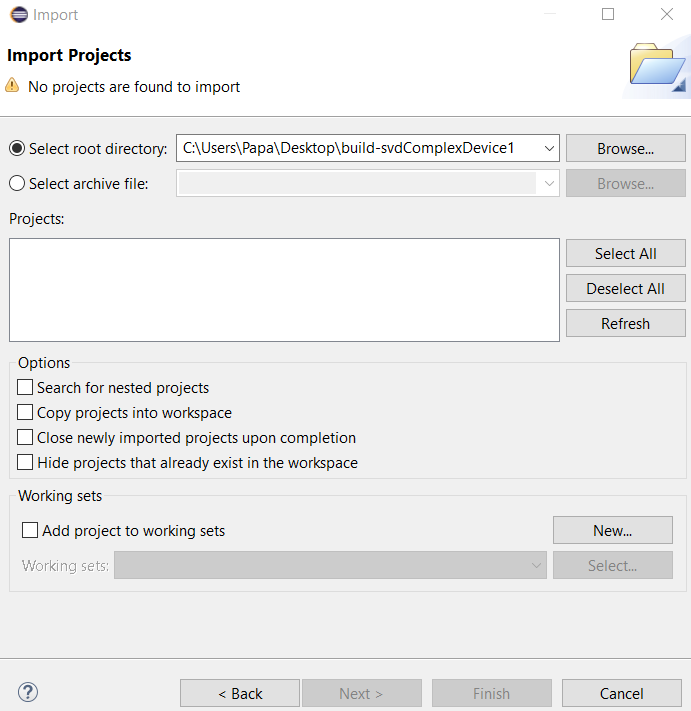
- Import Projects panel appears.
Click Browse... button.
- Select Folder dialog appears.
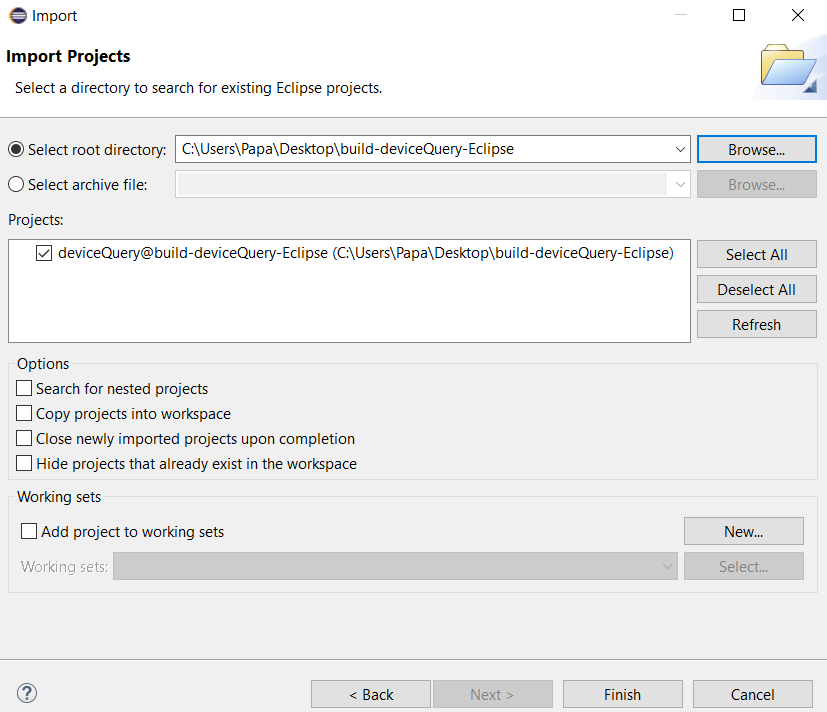
Select build-deviceQuery-Eclipse folder.
Click Select folder button. - Import Projects panel appears.
Click Finish button.
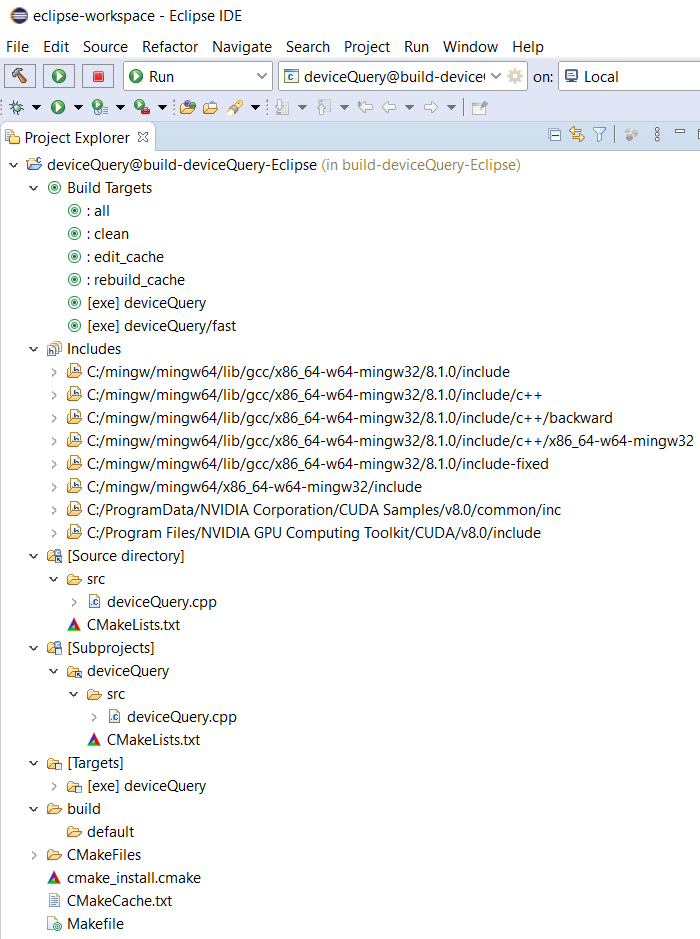
- Project Explorer of Eclipse is filled.
Click all button of Build Targets.
- Compilation data appear on Console tab.
The 64-bit executable file, deviceQuery.exe - [amd64/le], appears in Binaries folder of Project Explorer.
It is available in build-deviceQuery-Eclipse folder.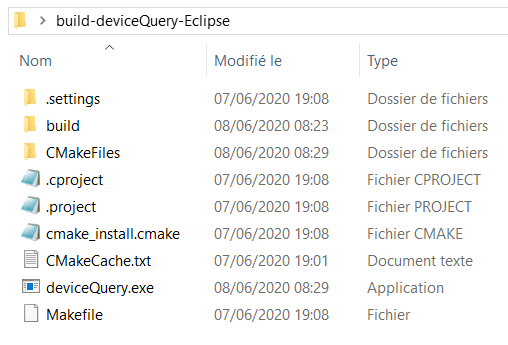
- Right-click deviceQuery.exe - [amd64/le] in Project Explorer.
Select Run As then 2. Local C/C++ Application.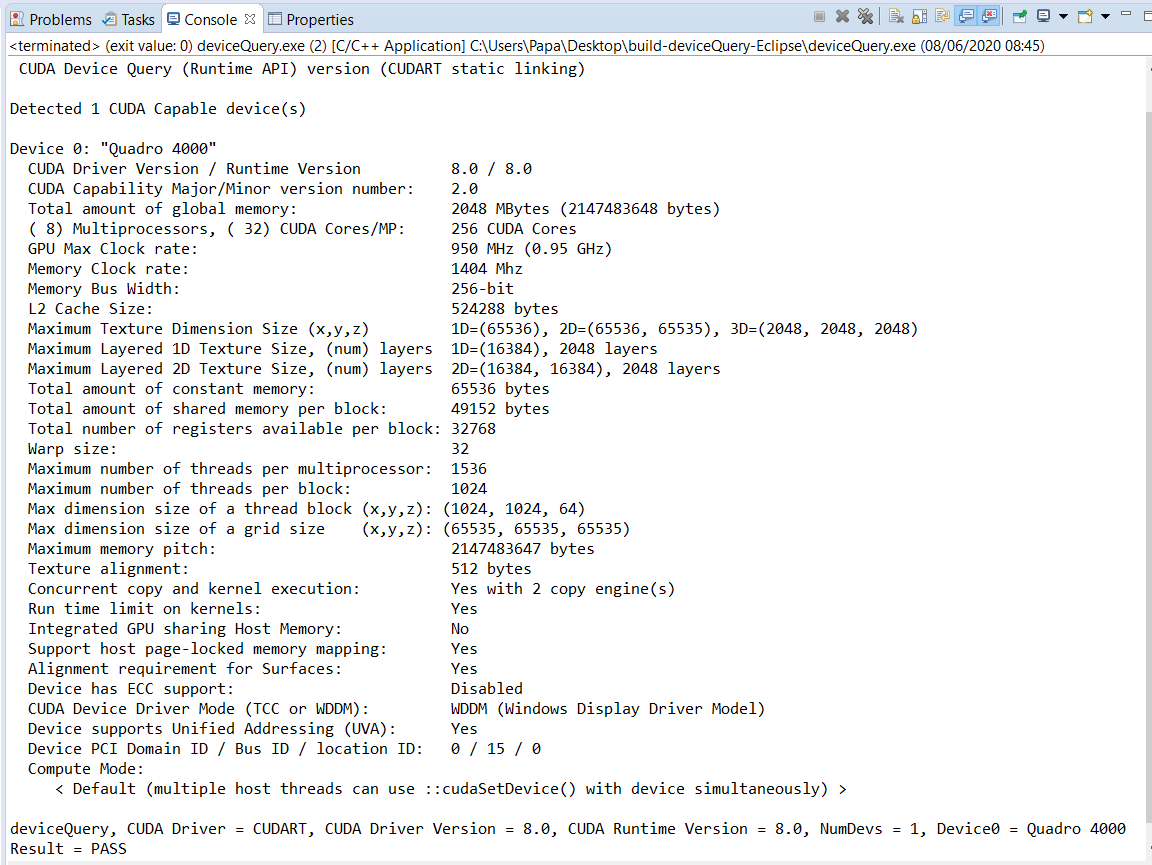
deviceQuery.cpp project with Visual Studio 14 2015 generator
- Generate build-deviceQuery-VS2015 folder on desktop of Windows 10.
- Launch CMake 3.17 GUI.
- Click File menu then select Delete Cache.
Input the path of deviceQuery folder in Where is the source code.
Input the path of build-deviceQuery-VS2015 folder in Where is build binaries.Click Configure button.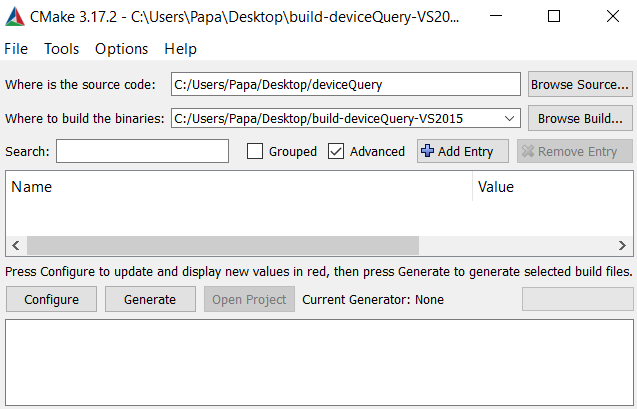
- Select Visual Studio 14 2015 for Specify the generator for the project.
Select x64 for Optional platform for generator (if empty, generator user: Win32)Click Finish button.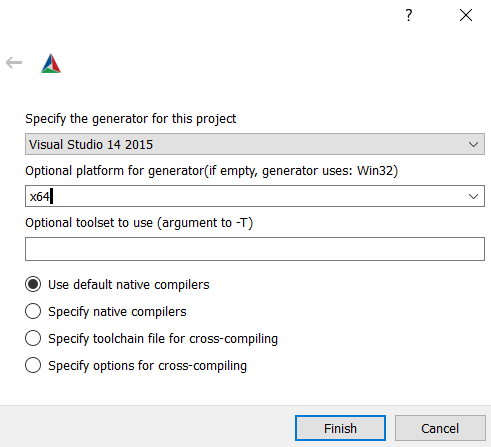
- Click Configure button.
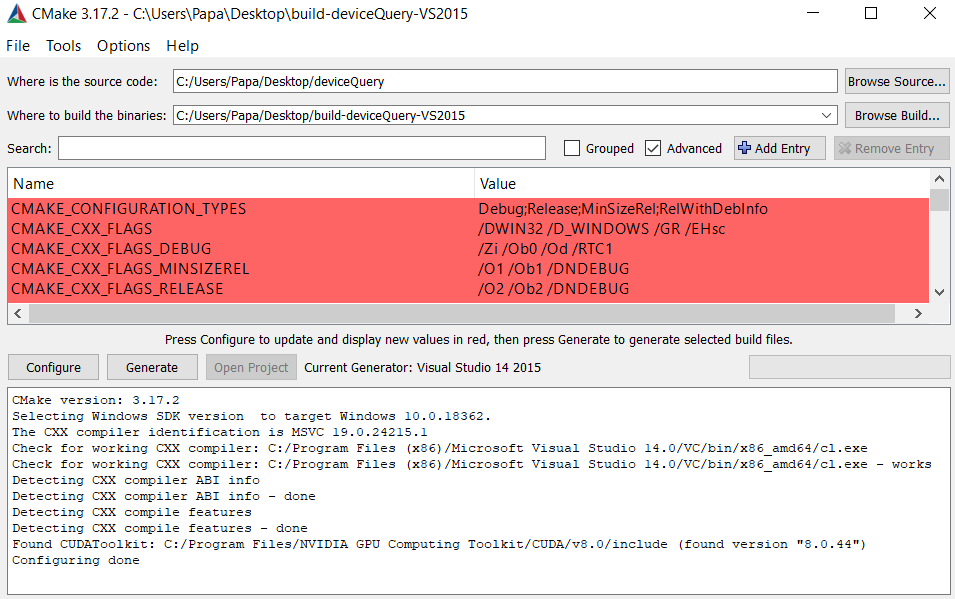
- Click Generate button.
- Nine files and one folder are generated in build-deviceQuery-VS2015 folder.

- Open build-deviceQuery-VS2015 folder.
Right-click deviceQuery.sln.
Select Open with... then Visual Studio 2015. - VS2015 is in Debug configuration and x64 environment.
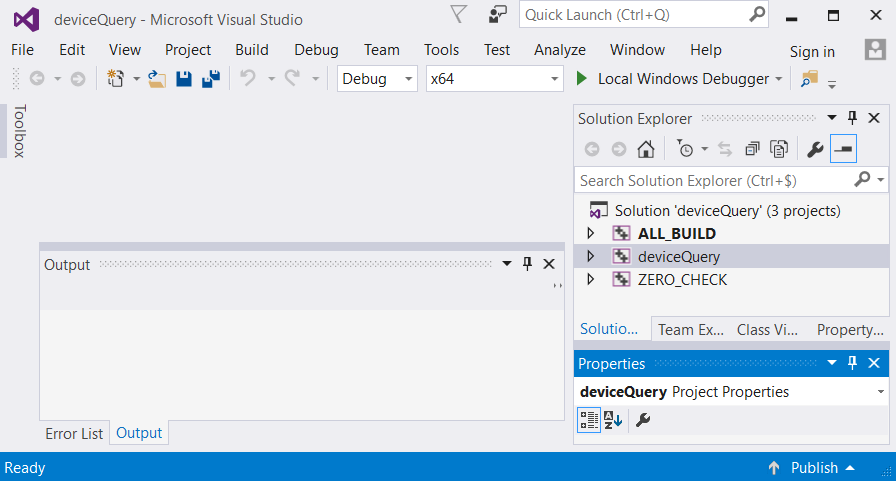
- Select Build menu then Build Solution.
- Build solution data appear on Output panel.
The 64-bit executable file, deviceQuery.exe, is available in Debug folder of build-deviceQuery-VS2015 folder.

CMake 3.17 CMakeLists.txt for svdComplexDevice1.dll
- Generate svdComplexDevice1 folder on desktop of Windows 10.
Add src folder and empty CMakeLists.txt file in svdComplexDevice1 folder. - src folder contains two files: svdComplexDevice1.cpp file and svdComplexDevice1.h file.
- Paste the following CMake 3.17 file into CMakeLists.txt
# CMakeLists.txt to build svdComplexDevice1.cpp
cmake_minimum_required(VERSION 3.17)
message(STATUS "CMake version: ${CMAKE_VERSION}")

project(svdComplexDevice1 VERSION 1.0
        DESCRIPTION "My first DLL program"
        LANGUAGES CXX)

find_package(CUDAToolkit)

if(${CUDAToolkit_FOUND})
    message(STATUS "Found lib CXX: ${CMAKE_CXX_STANDARD_LIBRARIES}")
    message(STATUS "Found CXX compiler: ${CMAKE_CXX_COMPILER}")
endif(${CUDAToolkit_FOUND})

# For compilation ...
# Specify binary name & source files to build it from
add_library(
    ${PROJECT_NAME}
    SHARED
    src/svdComplexDevice1.h
    src/svdComplexDevice1.cpp
)

# Specify target & CULA include directories
target_include_directories(
    ${PROJECT_NAME}
    PRIVATE
    "C:/Program Files/CULA/R15/include"
)

# Specify target & CULA library paths
target_link_directories(
    ${PROJECT_NAME}
    PRIVATE
    "C:/Program Files/CULA/R15/lib64"
)

# For linking ...
# Specify target & libraries to link it with
target_link_libraries(
    ${PROJECT_NAME}
    PUBLIC
    CUDA::cudart
    CUDA::cublas
    cula_core
    cula_lapack
)
svdComplexDevice1.dll project with Eclipse CDT4 - MinGW Makefiles generator
- Generate build-svdComplexDevice1-Eclipse folder on Windows 10 desktop.
- Launch CMake 3.17 GUI.
- Click File menu then select Delete Cache.
Input the path of svdComplexDevice1 folder in Where is the source code.
Input the path of build-svdComplexDevice1-Eclipse folder in Where is build binaries. Click Configure button. - Select Eclipse CDT4 - MinGW Makefiles for Specify the generator for the project. Click Finish button.
- Follow the procedure described for deviceQuery project in Section 2
.................... - Project Explorer of Eclipse CDT is filled.
Click all button of Build Targets.
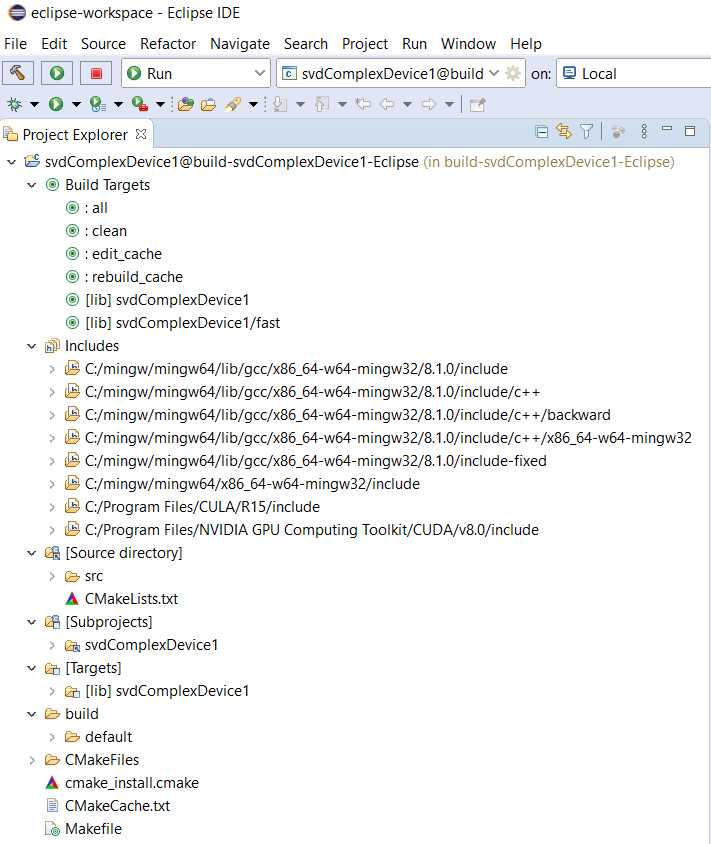
- Compilation data appear on Console tab.
The 64-bit dll file, libsvdComplexDevice1.dll - [amd64/le], appears in Binaries folder of Project Explorer.
It is available in build-svdComplexDevice1-Eclipse folder.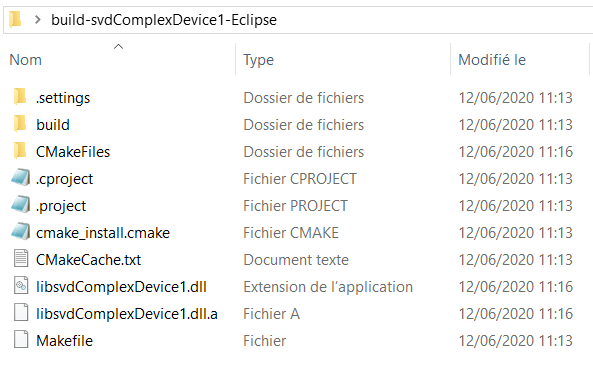
- Rename libsvdComplexDevice1.dll to svdComplexDevice1.dll.
svdComplexDevice1.dll project with Visual Studio 14 2015 generator
- Generate build-svdComplexDevice1-VS2015 folder on desktop of Windows 10.
- Launch CMake 3.17 GUI.
- Click File menu then select Delete Cache.
Input the path of svdComplexDevice1 folder in Where is the source code.
Input the path of build-svdComplexDevice1-VS2015 folder in Where is build binaries.
Click Configure button. - Select Visual Studio 14 2015 for Specify the generator for the project.
Select x64 for Optional platform for generator (if empty, generator user: Win32).
Click Finish button. - Follow the procedure described for deviceQuery project in Section 3
.................... - Select Build menu then Build Solution.
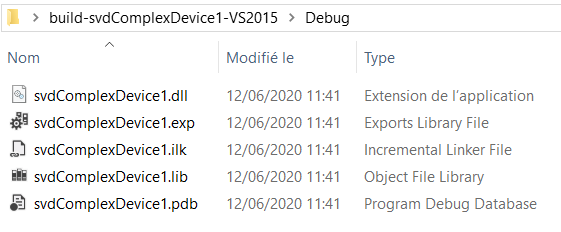
- Build solution data appear on Output panel.
The 64-bit file, svdComplexDevice1.dll, is available in Debug folder of build-svdComplexDevice1-VS2015 folder.
CMake 3.17 CMakeLists.txt for bandwidthTest.cu
- Generate bandwidthTest folder on desktop of Windows 10.
Add src folder and empty CMakeLists.txt file in bandwidthTest folder. - Copy and paste the file C:\ProgramData\NVIDIA Corporation\CUDA Samples\v8.0\1_Utilities\bandwidthTest\bandwidthTest.cu into bandwidthTest.cu file of src folder, which contains one file.
- Paste the following CMake 3.17 file into CMakeLists.txt
# CMakeLists.txt to build bandwidthTest.cu
cmake_minimum_required(VERSION 3.17)

project(bandwidthTest VERSION 1.0
        DESCRIPTION "My first CUDA program"
        LANGUAGES CUDA)

message(STATUS "Found headers CUDA: ${CMAKE_CUDA_TOOLKIT_INCLUDE_DIRECTORIES}")
message(STATUS "Found lib CUDA: ${CMAKE_CUDA_STANDARD_LIBRARIES}")
message(STATUS "Found CUDA nvcc: ${CMAKE_CUDA_COMPILER}")

# For compilation ...
# Specify binary name & source file to build it from
add_executable(
    ${PROJECT_NAME}
    src/bandwidthTest.cu
)

# Specify target & include directories
target_include_directories(
    ${PROJECT_NAME}
    PRIVATE
    "C:/ProgramData/NVIDIA Corporation/CUDA Samples/v8.0/common/inc"
)
bandwidthTest.cu project with Visual Studio 14 2015 generator
- Generate build-bandwidthTest-VS2015 folder on desktop of Windows 10.
- Launch CMake 3.17 GUI.
- Click File menu then select Delete Cache.
Input the path of bandwidthTest folder in Where is the source code.
Input the path of build-bandwidthTest-VS2015 folder in Where is build binaries.
Click Configure button. - Select Visual Studio 14 2015 for Specify the generator for the project.
Select x64 for Optional platform for generator (if empty, generator user: Win32).
Click Finish button. - Follow the procedure described for deviceQuery project in Section 3
.................... - Select Build menu then Build Solution.
- Build solution data appear on Output panel.
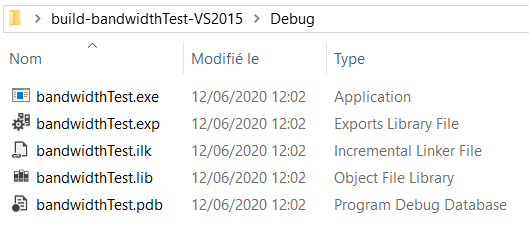
The 64-bit file, bandwidthTest.exe, is available in Debug folder of build-bandwidthTest-VS2015 folder.
CMake 3.17 CMakeLists.txt for Mandelbrot project
- Generate Mandelbrot folder on desktop of Windows 10.
Add src folder and empty CMakeLists.txt file in Mandelbrot folder. - Copy the six files Mandelbrot_kernel.h, Mandelbrot.cpp Mandelbrot_kernel.cuh, Mandelbrot_cuda.cu, Mandelbrot_gold.h, and Mandelbrot_gold.cpp of the folder C:\ProgramData\NVIDIA Corporation\CUDA Samples\v8.0\2_Graphics\Mandelbrot into src folder.
- Paste the following CMake 3.17 file into CMakeLists.txt
# CMakeLists.txt to build Mandelbrot
cmake_minimum_required(VERSION 3.17)

project(Mandelbrot VERSION 1.0
        DESCRIPTION "My first complex CUDA program"
        LANGUAGES CUDA CXX)

find_package(CUDAToolkit)

message(STATUS "Found headers CUDA: ${CMAKE_CUDA_TOOLKIT_INCLUDE_DIRECTORIES}")
message(STATUS "Found lib CUDA: ${CMAKE_CUDA_STANDARD_LIBRARIES}")
message(STATUS "Found CUDA nvcc: ${CMAKE_CUDA_COMPILER}")

# For compilation ...
# Specify binary name & source files to build it from
add_executable(
    ${PROJECT_NAME}
    src/Mandelbrot_kernel.h
    src/Mandelbrot.cpp
    src/Mandelbrot_kernel.cuh
    src/Mandelbrot_cuda.cu
    src/Mandelbrot_gold.h
    src/Mandelbrot_gold.cpp
)

# Specify target & include directories
target_include_directories(
    ${PROJECT_NAME}
    PRIVATE
    "C:/ProgramData/NVIDIA Corporation/CUDA Samples/v8.0/common/inc"
)

# Specify target & external glew64.lib library paths
target_link_directories(
    ${PROJECT_NAME}
    PRIVATE
    "C:/ProgramData/NVIDIA Corporation/CUDA Samples/v8.0/common/lib/x64"
)

# For linking ...
# Specify target & libraries to link it with
target_link_libraries(
    ${PROJECT_NAME}
    PUBLIC
    glew64
)
Mandelbrot project with Visual Studio 14 2015 generator
- Generate build-Mandelbrot-VS2015 folder on desktop of Windows 10.
- Launch CMake 3.17 GUI.
- Click File menu then select Delete Cache.
Input the path of Mandelbrot folder in Where is the source code.
Input the path of build-Mandelbrot-VS2015 folder in Where is build binaries.
Click Configure button. - Select Visual Studio 14 2015 for Specify the generator for the project.
Select x64 for Optional platform for generator (if empty, generator user: Win32).
Click Finish button. - Follow the procedure described for deviceQuery project in Section 3
.................... - Select Build menu then Build Solution.
- Build solution data appear on Output panel.
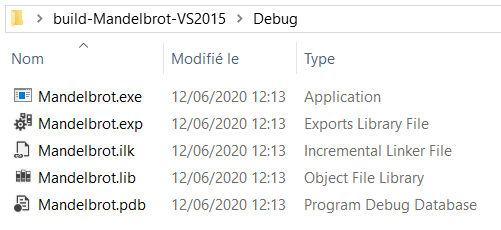
The 64-bit file, Mandelbrot.exe, is available in Debug folder of build-Mandelbrot-VS2015 folder.
- Copy and paste the two files glew64.dll and freeglut.dll from the folder
C:\Program Files\NVIDIA GPU Computing Toolkit\CUDA\v8.0\extras\demo_suite
into Debug folder of build-Mandelbrot-VS2015 folder.
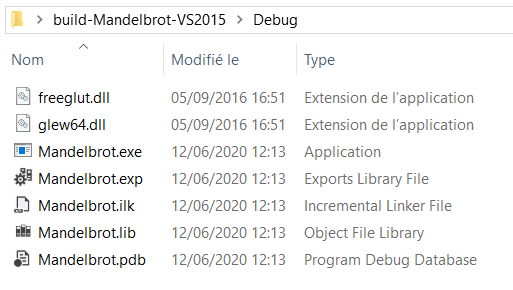
- Double click Mandelbrot.exe will launch the program.
Various references
- Alexandre Laurent: Utiliser CMake pour compiler un projet
- Florian Goujeon: Initiation à CMake
- Loïc Gouarin:
Introduction à CMake
- CMake: CMake tutoriel
- GitBook:
An introduction to modern CMake;
A simple example - Deniz Bahadir: More modern CMake - Working with CMake 3.12 and later
- YouTube: CppCon 2017: Mathieu Ropert “Using Modern CMake patterns to enforce a good modular design”
- GitHub: Effective modern CMake
- Daniel Pfeifer: CMake - introduction and best practices
- Kuba Sejdak: Modern CMake is like inheritance
- Nick Winder: Modern CMake tips
- Kohei Otsuka: Simple modern CMake tutorial part 1
- Pablo Arias:
It's time to do CMake right
- Guru99, Barbara Thompson: C tutorial for beginners: Learn C programming language basics
- LLVM: CMake primer
- John Lamp: CMake tutorial
- Derek Molloy: Introduction to CMake by example
- Mirko Kiefer: CMake by example
- Dmerej's blog: Let's build Chuck Norris! - Part 1: CMake and Ninja
- Android Studio: Configure CMake
- Visual Servoing Platform Tutorial: How to create and build a project that uses ViSP and CMake on Unix or Windows
- Selective Intellect:
How to use CMake to add third party libraries to your project
- Microsoft: Projets CMake dans Visual Studio
- Kitware Robot: Generator specific information
- Preshing on Programming: How to build a CMake-based project
- Javier V. Gómez: How to configure a C/C++ project with Eclipse and CMake
- StackOverflow:
How to configure Eclipse CDT for Cmake?
In Eclipse-CDT you do not create Cmake project but you import Cmake project. - Packt Publishing Limited: Importing a CMake project into Eclipse CDT
- John Mcgehee:
Build with CMake in Eclipse
- gitlab.kitware: How to find libraries
- Simplify C++!: Hello CMake!
- ROS:
catkin/CMakeLists.txt
What does find_package() do? - deal.II: How to use CMake to configure your projects with deal.II
- GitHub: How to set include directories in CMake
- StackOverflow: How do I add a library path in cmake?
- StackOverflow: Link a shared library with CMake
- StackOverflow: Preferred cmake project structure
- StackOverflow: How to properly link libraries with cmake?
- StackOverflow: Cuda CMake 3.10 CMakeLists.txt
- StackOverflow: CMake: how to add cuda to existing project
- GitHub: CMake boost example
- GitHub, Thom Troy: cmake-examples
- GitHub, Ashwin Nanjappa: Sample CMakeLists.txt file to build a CUDA program
CUDA references
- Code Yarns: How to build CUDA programs using CMake
- Nvidia developer blog: Building cross-platform CUDA applications with CMake
- CMake: FindCUDAToolkit
- Attila Krasznahorkay: Building CUDA code
- Stackoverflow:
Obtaining the CUDA include dir in C++ targets with native-CUDA-support CMake?
find_package(CUDAToolkit)
add_executable(
  binary_linking_to_cudart
  my_cpp_file_using_cudart.cpp
)
target_link_libraries(
  binary_linking_to_cudart
  PRIVATE
  CUDA::cudart
)
- Jared Casper: Provide target libraries for cuda libraries
- Siyuan Liu: CUDA as a language in CMake
- Luke Yeager: CUDA with CMake 3.8
- Jonathan R. Madsen: Build systems - GPU offloading
- developpez: Cmake pour CUDA project
- Benjamin Charlier: Find CUDA and GPUs
- Narkive: How do you allow CMAKE_CUDA_COMPILER to be optional via project LANGUAGE?
- Pierre Aubert: Le fichier CMakeLists.txt
- PROJ:
Using PROJ in CMake projects
By adding the imported library target to the target link libraries, CMake will also pass the include directories to the compiler. This requires that you use CMake version 2.8.11 or later. - CLion: Working with CUDA projects
- StackOverflow: How to compile C++ as CUDA using CMake
- StackOverflow: Linking of CUDA library in CMake